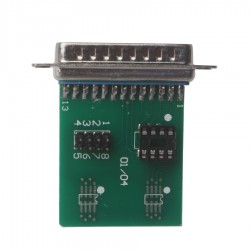
Cheap V4.94 Digiprog III Digiprog3 Odometer Master Programmer Entire Kit


Cheap V4.94 Digiprog III Digiprog3 Odometer Master Programmer Entire Kit
$159.00
Ex Tax: $159.00
- Stock:
- Model: SM47-D
- Weight: 4.10
- Dimensions: 33.00 x 22.00 x 30.00
- SKU: SM47-D
Cheap V4.94 Digiprog III Digiprog3 Odometer Master Programmer Entire Kit
Top 7 Reasons To Get V4.94 Digiprog3 Odometer Master Programmer:
1. This is newest version Digiprog3 with most competitive price.
2. Newest Version: V4.94
3. Supported Languages: Deutsch, English, Espanol, French, Portuguese, Italian, Turkish, Nederlands.
4. Worldwide leader in digital speedo programming and correction software.
5. Quality standards are second to none.
6.Years of experience in digital vehicle engineering.
7. Professional technical service.
Notice: Power-On Password:1
V4.94 Add Model List:
Ford :
F150 24C16
Falcon 24c02
Kuga Transit
Kuga Transit
Mercedes :
W176 new version
W204 new version Diag
W212 new version Diag
R 172 Diag new version
R 231 Diag new version
Opel :
Insignia new version
Astra new version
For Audi :
A6 Diag new version
A8 Diag new version
For VW :
Amarok Polo Johnson
Refer to Digiprog3 DP3 v4.04 Clone mileage Correction Feedback:
?
Service Interval Adjustments and Settings
Assyst processing
Fault memory read-erase
EEPROM programmer
Integrated PC communication
?
Some Important Tips for Using Digiprog 3:
?
1. Always connect the Eeprom to the ST01 or ST04 before you connect to the DigiProg this will avoid Electro static feedback (ESD).
2. Never solder the connections whilst the lead is connected to the programmer, this will damage the DigiProg.
3. Always keep your DigiProg in its case when not in Use & keep it in a dry environment at night (don’t leave it in the trunk of your car) If you are using solvents to remove lacquers from eeprom ensure they are cleaned
4. completely as the solvent can damage the clips.
4. completely as the solvent can damage the clips.
?
Digiprog 3 Menu:
?
1. EEPROM Menu
The first option on the main menu is the Eeprom menu. Reading, writing and saving eeprom information is all done using this menu. A more detailed guide to using this menu follows later on in the introduction.
?
2. CAR/TRUCK Menu
This is the menu you will use for correcting and reprogramming vehicles. Manufacturers are set out in alphabetical order and models of vehicles are set out in a simple sub-menu format.
?
3. Motorcycle Menu
This menu is the same as the CAR/TRUCK menu but is used for reprogramming motorcycles.
?
4. Special Functions Menu
The special functions menu is for use only by official DigiProg dealers.
?
5. Setup Menu
This menu is where settings on your DigiProg can be changed. Language, password, brightness, volume, and the time/date can all be set and changed in this menu. You can also change whether your machine is working in kilometres or miles.
?
Using the EEPROM Menu:
?
On some of the vehicles you will come across, an eight pin Eeprom chip will be used to store the vehicle data. These chips hold vital information from the vehicle such as ignition and immobiliser codes. Loss of this information could result in anything from minor faults, to major faults involving the vehicle not starting and having to be taken to the main dealer. This is why it is very important to read and save the original information from the Eeprom before programming, this way if any errors do occur you can always return to the point you started. The process of reading and saving this information is very simple. The Eeprom chip itself will have a mask number printed across the top of it, for example a widely used chip is a 93C46. You can connect the chip to your DigiProg by using adaptor ST01 or ST04. Most chips are surface mount eeproms which will use ST01, but the larger DIL chips will use ST04.
?
Digiprog III V4.94 Screen Display:
![rel=]()
Digiprog 3 V4.94 Other Features:?
?
Service Interval Adjustments and Settings
Assyst processing
Fault memory read-erase
EEPROM programmer
Integrated PC communication
?
Some Important Tips for Using Digiprog 3:
?
1. Always connect the Eeprom to the ST01 or ST04 before you connect to the DigiProg this will avoid Electro static feedback (ESD).
2. Never solder the connections whilst the lead is connected to the programmer, this will damage the DigiProg.
3. Always keep your DigiProg in its case when not in Use & keep it in a dry environment at night (don’t leave it in the trunk of your car) If you are using solvents to remove lacquers from eeprom ensure they are cleaned
4. completely as the solvent can damage the clips.
4. completely as the solvent can damage the clips.
?
Digiprog 3 Menu:
?
1. EEPROM Menu
The first option on the main menu is the Eeprom menu. Reading, writing and saving eeprom information is all done using this menu. A more detailed guide to using this menu follows later on in the introduction.
?
2. CAR/TRUCK Menu
This is the menu you will use for correcting and reprogramming vehicles. Manufacturers are set out in alphabetical order and models of vehicles are set out in a simple sub-menu format.
?
3. Motorcycle Menu
This menu is the same as the CAR/TRUCK menu but is used for reprogramming motorcycles.
?
4. Special Functions Menu
The special functions menu is for use only by official DigiProg dealers.
?
5. Setup Menu
This menu is where settings on your DigiProg can be changed. Language, password, brightness, volume, and the time/date can all be set and changed in this menu. You can also change whether your machine is working in kilometres or miles.
?
Using the EEPROM Menu:
?
On some of the vehicles you will come across, an eight pin Eeprom chip will be used to store the vehicle data. These chips hold vital information from the vehicle such as ignition and immobiliser codes. Loss of this information could result in anything from minor faults, to major faults involving the vehicle not starting and having to be taken to the main dealer. This is why it is very important to read and save the original information from the Eeprom before programming, this way if any errors do occur you can always return to the point you started. The process of reading and saving this information is very simple. The Eeprom chip itself will have a mask number printed across the top of it, for example a widely used chip is a 93C46. You can connect the chip to your DigiProg by using adaptor ST01 or ST04. Most chips are surface mount eeproms which will use ST01, but the larger DIL chips will use ST04.
?
Digiprog III V4.94 Screen Display:
![rel=]()


Digiprog 3 V4.94 Other Features:?


?
Service Interval Adjustments and Settings
Assyst processing
Fault memory read-erase
EEPROM programmer
Integrated PC communication
?
Some Important Tips for Using Digiprog 3:
?
1. Always connect the Eeprom to the ST01 or ST04 before you connect to the DigiProg this will avoid Electro static feedback (ESD).
2. Never solder the connections whilst the lead is connected to the programmer, this will damage the DigiProg.
3. Always keep your DigiProg in its case when not in Use & keep it in a dry environment at night (don’t leave it in the trunk of your car) If you are using solvents to remove lacquers from eeprom ensure they are cleaned
4. completely as the solvent can damage the clips.
4. completely as the solvent can damage the clips.
?
Digiprog 3 Menu:
?
1. EEPROM Menu
The first option on the main menu is the Eeprom menu. Reading, writing and saving eeprom information is all done using this menu. A more detailed guide to using this menu follows later on in the introduction.
?
2. CAR/TRUCK Menu
This is the menu you will use for correcting and reprogramming vehicles. Manufacturers are set out in alphabetical order and models of vehicles are set out in a simple sub-menu format.
?
3. Motorcycle Menu
This menu is the same as the CAR/TRUCK menu but is used for reprogramming motorcycles.
?
4. Special Functions Menu
The special functions menu is for use only by official DigiProg dealers.
?
5. Setup Menu
This menu is where settings on your DigiProg can be changed. Language, password, brightness, volume, and the time/date can all be set and changed in this menu. You can also change whether your machine is working in kilometres or miles.
?
Using the EEPROM Menu:
?
On some of the vehicles you will come across, an eight pin Eeprom chip will be used to store the vehicle data. These chips hold vital information from the vehicle such as ignition and immobiliser codes. Loss of this information could result in anything from minor faults, to major faults involving the vehicle not starting and having to be taken to the main dealer. This is why it is very important to read and save the original information from the Eeprom before programming, this way if any errors do occur you can always return to the point you started. The process of reading and saving this information is very simple. The Eeprom chip itself will have a mask number printed across the top of it, for example a widely used chip is a 93C46. You can connect the chip to your DigiProg by using adaptor ST01 or ST04. Most chips are surface mount eeproms which will use ST01, but the larger DIL chips will use ST04.
?
Digiprog III V4.94 Screen Display:
![rel=]()
1pc x Digiprog3 Main Unit
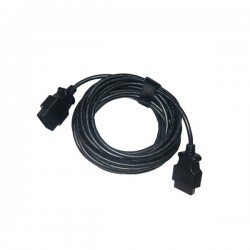
1pc x OBD2 Cable
1set x Cables and Adapters
